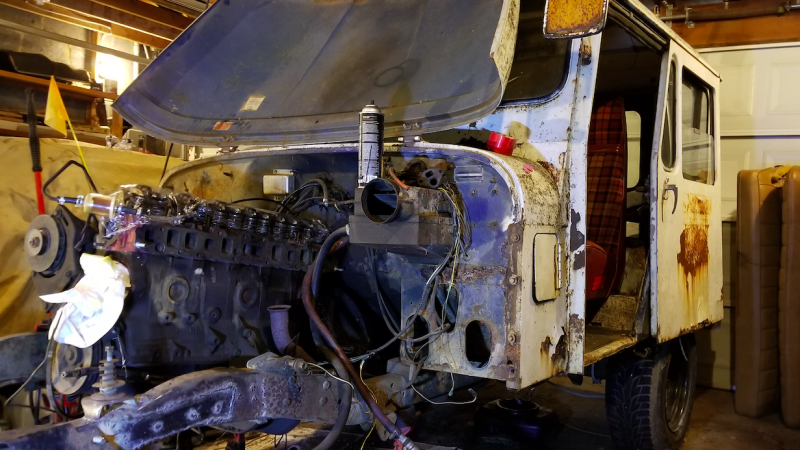

“There’s no way in hell this will work,” I thought to myself from sun up to sun down this past Saturday and Sunday, as I attempted to refurbish the ridiculously rusty cylinder head I’d bought off the floor of a former Chrysler engineer’s garage that week. My $500 Postal Jeep’s old head was cracked, and this new one was a chance at new life. But things looked bleak.
The good news was that, according to the machine shop where I’d dropped my new part off, the head was not cracked, but the bad news was that the valves all leaked. “Yeah, there’s so much rust in there,” the man from the machine shop told me over the phone.
“What do you want to do?” he asked. I thought for a moment. I didn’t know what to do, if I’m totally honest, but with the awkward silence growing ever more uncomfortable, I blurted “Just mill the head.” We ended the call.

Two minutes later, I realized what I’d done. What was the point of milling the head—cutting it so that it could fit perfectly flat on the block without leaking—if the valves were shot? That’s a waste of $70 on a vehicle that’s worth about…well, that. I snatched my phone and called back. “Never mind on the milling,” I said, attempting to act as if I totally knew what I was doing.
Advertisement
I was too late. He’d already given his machinist the orders; that head was getting cut. After realizing that this project had gotten out of hand, and that I was about to drop $100 on a totally useless cylinder head (magnafluxing—checking it for cracks—cost $30), I settled into a state of hopelessness. The project was doomed.
But being the stubborn bastard that I am, after picking up the head, I decided to go double-or-nothing. Not only had I dropped a Benjamin to check and mill my head, which had been diagnosed as having bad valves, but I also decided I was going to spend all weekend trying to fix the thing. If I failed, I’d be out not just the $100, but also an entire precious weekend—one of four remaining before my planned departure to the off-road Mecca that is Moab, Utah.
If this went wrong, it would surely put an end to Project POStal.

Advertisement
I brought the head to my dining room, and placed it across a pair of chairs. The exhaust ports looked okay, as they’d been covered with a thick layer of black carbon. But the intake ports were badly rusted; notice the orange squares in the picture above.
I clamped my valve spring compressor tool onto each spring, and twisted the handle until the steel coils were so short, I could—using a magnet—remove the two keepers holding the top of the valve to the top of the valve spring retainer.

Advertisement
Once the keeper was out, the spring and spring retainer could lift right off, and the valve could drop right out of the bottom of the head. I did this 12 times, taking about five minutes per valve. There went an hour of my life. And all just so I could see this mess:

Here’s a closer look:

Advertisement
Ugh. Look at all of that rust in those intake ports. And worse was the rust on the valves. Brace yourselves:

All six intake valves looked like that—covered in a layer of Cheeto dust:

Advertisement
After wiping the valves off with paper towels, I placed them in cups of industrial degreaser, which wouldn’t help with the rust as much as it would remove any carbon buildup, in theory.

As for the ports themselves—I hit those with foaming engine degreaser, expelling what looked like s’mores from the intake ports:

Advertisement
A decent amount of rust escaped from the head, but there was still plenty left:

From there, I moved my cylinder head into my garage, and broke out my drill, along with a brass-coated wire brush attachment:

Advertisement
After drilling my ports from both ends for about a half an hour, I found that the tool had done a very nice job. Here’s a photo of one of the intake ports prior to the wire brush cleaning:

And here’s what they looked like after:

Advertisement
Here’s a shot of some intake ports pre-brushing:

And here’s an after shot:

Advertisement
Then came the hard part—cleaning the carbon and rust buildup on the valves. I was worried about using the brass-coated steel wire brush I had used for the ports, since I didn’t want to scratch any sensitive sealing surfaces. So I used my Dremel with a brass wire wheel and brass wire cup, and gradually cleaned the little metal mushroom sticks:

I did the same to the valve seats, getting as much crud off the precious mating surfaces as possible, as any peaks or valleys would prevent the valves from sealing against the head, and thus no compression could be built. The motor, then, would not run properly.
Advertisement

At this point, I still considered this job a Hail Mary. Yes, the valves and valve seats were looking a lot better now that I’d cleaned them up, but if you looked closely enough, you could see tiny little pits.
Still, realizing there was no turning back, I dug in, placed some lapping compound on a valve, shoved it back into its valve guide, and began grinding:
Advertisement
That sound you hear in the video above is the valve and valve seat grinding away at one another to create—in theory—a nice, even mating surface. The tool I’m using in the video is essentially just a stick with a suction cup at its end, which grabs onto the end of the flat face of the valve:

Lapping valves by hand is a great American past time, but it’s also an enormous time-suck, taking me 45 minutes to do a single one. That, times 12, would have taken me all night. So, at the suggestion of a number of my Instagram commenters, I popped the suction cup off the stick and onto the end of my drill, using a quarter-inch drive socket extension as an adapter:

Advertisement
For about five hours, I cleaned valves with paper towels, hit them and the valves seats with dremel-powered brass wire brushes, and then used my drill and valve grinding compound to lap the valves against their seats. Each valve got two or three tries with the drill, with me wiping the grinding compound away after each, and then I finished off with about five minutes of hand-lapping.
The result was a mating surface that went from this:

Advertisement
To this:

Notice that nice, strong white line there where the valve mates with the head. Look closely enough, though, and you’ll find tiny little imperfections in that mating surface on both the valve and the valve seats.
Advertisement

With the valves all cleaned and lapped, I installed them into the head, popped on some valve stem seals (shown below) to keep oil from running down into the combustion chamber and smoking out of my exhaust pipe, and used my compressor tool to get the valve springs and keepers into place.

Advertisement
But after I installed my first lapped valve, I ran a quick test, which convinced me that my dream of somehow fixing this rusty head had come to a crashing halt:
I’d heard that a great way to check how well a valve seals is by pouring mineral spirits (basically, a low-viscosity paint-thinner) into the ports and watching to see if it somehow made it past the valves. Unfortunately, it only took a few seconds for the fluid to leak through my intake valve.
Advertisement
At this point, I thought I was finished. $100 down the drain. An entire day of wrenching: gone. The Postal Jeep: a doomed machine.

But then, just for kicks, I poured some mineral spirits into my old, cracked head, which had allowed the engine to run reasonably well, and to make an impressive 120 PSI across all six cylinders. “With that good compression, surely these valves won’t let any fluid through,” I thought. I thought wrong. All of the valves leaked.
Advertisement
At this point, I went from deflated to hopeful; if my old head can leak a little bit, and still allow for good combustion, maybe my new one can, too? So I continued lapping the rest of my valves and installing them back into the head, finishing on Sunday at around noon after a short night of sleep.

Once that was done, I cleaned the head, and readied my block to receive 80 pounds of iron on its deck. First, I replaced the lifters, which I was convinced were the source of the ticking noise the motor had made when I’d first started it many months prior. I lathered their flat bottoms with assembly lube, and dropped them onto the camshaft lobes with a magnet:
Advertisement

Then I placed the head gasket onto the deck:

Advertisement
And, after a bunch of sliding and just general struggling as my weak blogger-body tried manipulating a huge chunk of iron, I got the heavyweight head into place, and torqued it all down using the old head bolts, since the new ones I’d purchased from a random seller on Ebay had been too small. (Generally, you want to use new head bolts every time you install a head).

I grabbed my pushrods and rocker arms, which I’d labeled and organized to remember which valve each set belonged to, and fastened them into position:

Advertisement
Then came the biggest moment of the weekend. I grabbed my compression tester, and threaded it into spark plug hole number four to check compression. If I had somehow cleaned up and lapped those valves and valve seats well enough to contain air at 100 PSI or above, this would be enough to allow for combustion, and I was going to run it.
I jumped the starter motor with a battery and jumper cables, and listened to the motor crank. I felt a very weak pulse shoot through the tester in my left hand. The gauge jumped up only a small tick. “Oh shit. 60 PSI.”

Advertisement
“I knew it. I knew this wasn’t going to work!” I said aloud. Why I decided to waste $100 and an entire weekend on a rusty head that had just been laying on the floor of a garage is beyond me. This thing needed machining work, not just a tube of valve lapping compound and a prayer.
For fun, I went ahead and tested cylinder three. 120 PSI. Hmm. Then I checked cylinder two: also 120. Then I checked six: 120 PSI again!
I had somehow revived five out of six cylinders to a point where they made solid compression—compression that would absolutely facilitate combustion. At this point, I decided that—having spent 12 hours on this—I might as well just go all in until either I fixed this thing or I found myself crying in the corner of my cold, dark garage, praying to the Jeep gods for mercy.
Advertisement
I removed all the rocker arms and pushrods, unzipped all the cylinder head bolts, and took the head off. Then I popped out both valves from cylinder four, and lapped the crap out of them with some compound and my suction cup-outfitted drill. Looking closely, I did see some very light pitting near my intake valve seat:

And I did see some tiny lines in the valve’s mating surface:

Advertisement
But I kept at it with the drill, and finished it off by lapping it by hand. Then I installed the valves, valve stem seals, keepers, and valve springs, cleaned the head off again, and threw it back onto the block.
I threaded my compression tester into spark plug hole number four, and prayed to the junkyard supervisor in heaven as I inched my jumper cables toward the battery. The fate of this project, I thought, rested on this moment. The cable touched the battery post, and the engine turned over.
Advertisement
The Jeep gods had answered my prayers. One hundred twenty PSI!
I later found another cylinder—cylinder one—to have low compression, but after a few cranks, that began reading 120 PSI as it had before. I’ve now got an engine that will theoretically run!
That’s not to say it will run perfectly, as many of the valves slid into the head like a hotdog down a hallway (or whatever that expression for worn valve guides is), so it may smoke a bit.
Advertisement
Plus, there’s the fact that this only represented about 10 percent of all of the issues I have to solve in the next month to have any chance in heck of making it 1,700 miles to Moab. My brakes, suspension, steering, electrical system, body, carburetor, and a whole lot else needs to be mended by April 10th.
And while I can’t say I’ll pull this off in the end, this major victory over my Jeep’s old cracked cylinder head has given me some much-needed motivation. Bring it on, Project POStal.