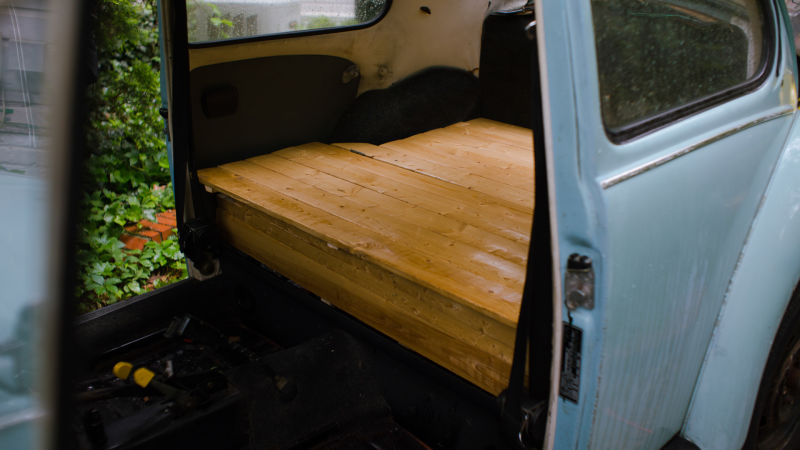
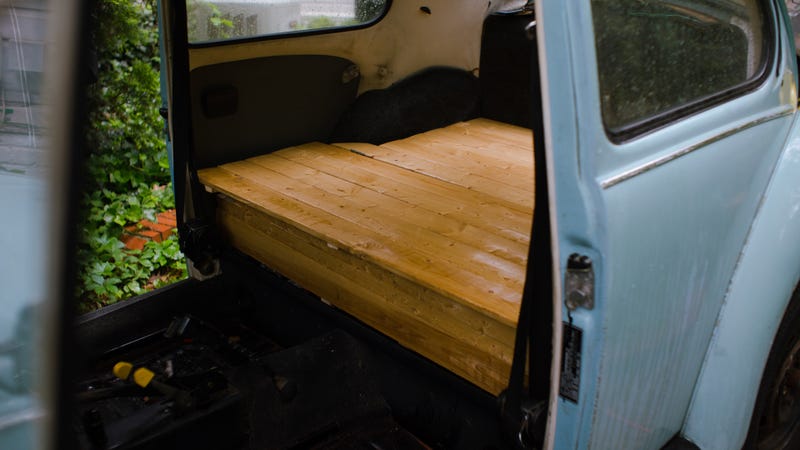
I don’t know how long I’ve had this stupid fascination with putting a wood deck into the back of my clunky old Volkswagen, like some enclosed truck, or the world’s smallest ‘70s van. Finally, my car now has one, and I’m surprised at how easy it was to build.
Advertisement
There are a couple reasons why I never got around to doing this before. Outside of half a year in middle school, I’d never done any woodworking at all. Never sanded anything, never stained anything, never built anything more complicated than a couple Ikea beds, and all you do there is follow some instructions. So I wasn’t really set up for making something with no guide or kit. I also had a bit of a mental block between ‘car stuff’ and ‘normal stuff.’ It always seemed like the two didn’t really translate between each other. I don’t know, it’s a hard vibe to explain. Whatever. I never really thought of a wood deck as being easily attainable. It was more like a faraway fantasy.
Holy hell I was wrong. This could not have been easier.
The first important step of this project (at least for somebody completely inexperienced like me) is to find a buddy. I drove all the way to North Carolina to meet up with my coworker Jason Torchinsky. He has an old VW like mine, but more importantly he’s an artist who has build a number of larger and small wooden sculptures. Also he has very little sense of limitation of what is or is not possible. Think through your mental rolodex of who you know who is like this. That’s a good person to know. Send them a compliment today.
Advertisement
Jason immediately liked the plan and saw it as simple as it really was: measure out the back area of the car, get some wood cut into slats that fit those dimensions, then screw those pieces of wood together. We could even hinge the wood deck for easy access to the battery underneath and make some simple supports for the wood so it wouldn’t bend or bow.
We measured out the rear parcel shelf and the area where the back seats had been.
We went to the local big hardware store to pick out some wood. (Somehow, the very cheapest wood ended up meeting our criteria. I think this was some kind of sign.)
We got some sandpaper, some stain for the wood, and a box of the shortest drywall screws we could get our hands on, at an inch and a quarter.
Normally the hardware store will cut the wood for you into sections, but their machine was broken that day. We chopped out our 36″ and 48″ sections in Jason’s driveway using his circular saw. His kid Otto watched and used the wood as a little ramp for one of his Lego trucks.
Advertisement
Sponsored
We cut some skinnier sections of wood we’d bought at the store to hold everything together, too. All we did after that was line all the pieces up and screw them together. The only trick was to go very slowly and carefully, as not to crack the thin wood.
We had to move to the street, as it was flatter than Jason’s gravel driveway. Safety third!
We hit one hurdle, and that was our diagram on how the wood would cover the area where the back seats had been was a straight rectangle. We had forgotten that the rear wheel wells slightly cut in on that space, so we had to trim one of the longer boards.
After that I sanded all the boards. Then sanded some more. Then sanded again. I continued sanding until I ran out of time for sanding. The panels are as smooth as they’re going to be.
Staining the wood was easy, though I’d never done it before. I laid down a coat and let it dry inside overnight.
We did run out of wood at the very end. I nearly bought an extra piece of wood just in case we broke something, and we could have used it to make another slat covering up the front supports, basically built like a fence. I would have bought it, too, but the aisle at the hardware store was temporarily closed for cleaning when I walked back to pick it up, so I passed on it. Oh well.
The only thing that really made any of this different than woodworking for your house was that the surface itself wasn’t flat. When you build a table, you’re just working off of your flat floor. My VW has a double-step from up where the is engine in the back down to the floor beneath the seats. We used some wood that Jason had lying around to make some posts to hold up the section in the middle and at the front. The weight of the whole thing largely holds everything in place.
Honestly, I’m stunned at this point at how easy and step-by-step this whole thing came together. And it was cheap, too. All in it was about $80, and that included buying the stain, a fancy brush for the stain, all the screws, the sandpaper, some extra carpet to line my frunk, two toolboxes that I needed and a couple feet of hose for some unrelated drain lines on the car. The wood itself couldn’t have been more than $10.
Advertisement
All in, it doesn’t look too bad! It holds weight well and that’s really most of what I wanted out of it. I do have a few idle thoughts about re-doing the whole thing with nicer wood, slats that follow the direction of the car, and some stainless steel rails covering the gaps like you’d get on yachts and stuff.
Ah, who am I kidding. I’ll re-stain it when I get home and it’ll be fine.