Scoring a great deal off of Craigslist is such a wonderful feeling. However, it’s the addiction to that feeling that can blindly lead you into trouble.
Anyone who has done the Craigslist buying game knows how it goes. Days fraught with searching for a machine which straddles the balance between affordability, relative cleanliness, and uniqueness equates to a challenging pursuit of passion. Sometimes that new-to-you Craigslist find comes blessed with a host of secret “personal touches” from the previous owner. Often these wonderful surprises don’t surface until after you’ve owned said vehicle for a couple of days.
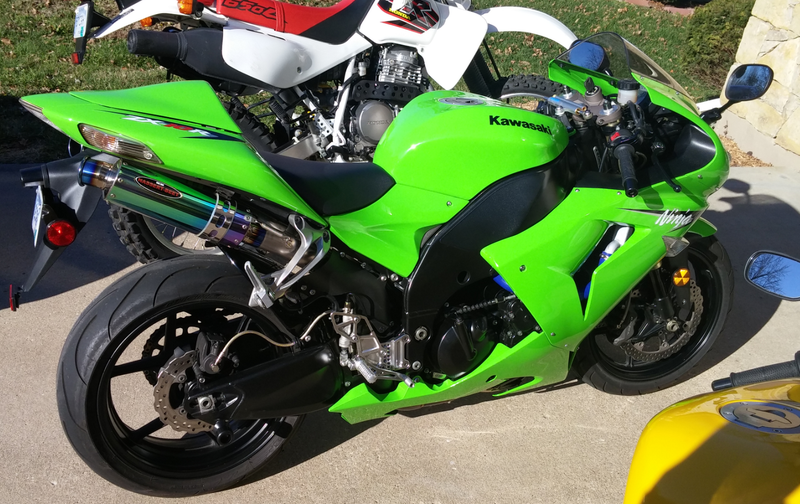
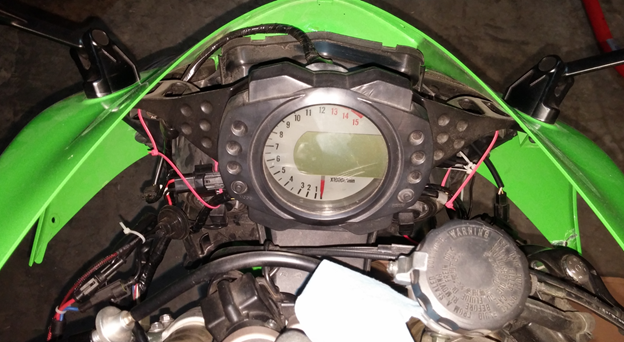
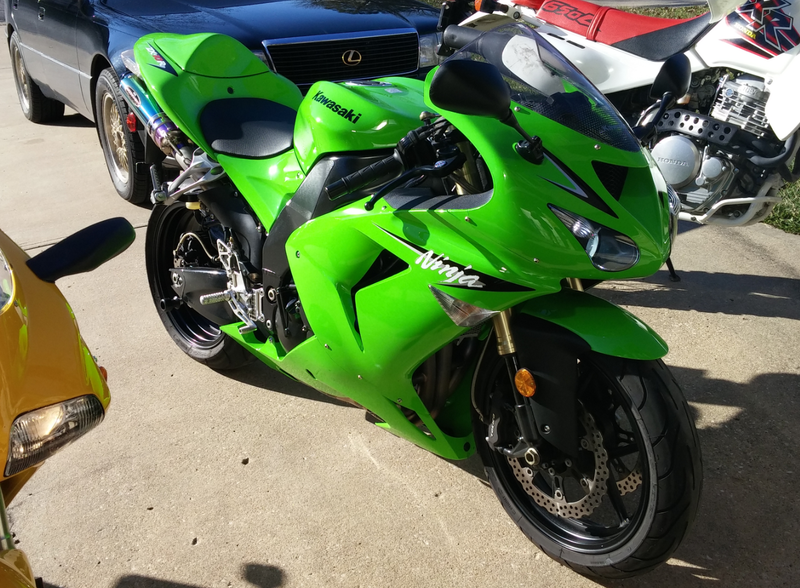
I bought a 2007 Kawasaki Ninja ZX-10R off the List a couple of months ago and the bike looked great – at first. It had a few obvious issues upon initial inspection but none of them looked too threatening.
Advertisement
The rear brake pedal wasn’t triggering the brake light, yet the light worked just fine when the front brake was applied. Perhaps a bad switch connection? Probably an easy fix.
The list continued: a couple of minor fairing scratches, a questionable tag mount location, a hint of DIY wiring, a very DIY crankcase vent tube dumping out of the fairing, pink zip ties securing wiring behind the front cowl, and a coolant reservoir that was almost empty. That last one may sound very concerning, but I put my mind at ease by chalking it up to the owner not knowing how to properly bleed the cooling system. He said he had just changed the coolant.
Sponsored
That list of negatives doesn’t paint a pretty picture, but with used sportbikes, these are the hurdles you have to overcome especially if you’re hunting for a deal. Even so, there were tons of positives to counteract some of the “easily fixed” negatives I had noted. The bike came fitted with a rare full titanium exhaust system, custom fuel and ignition mapping devices, adjustable aluminum foot pegs, silicone coolant hoses, steel braided brake lines, and HID headlights. It also came with all of the stock parts as well as a front end stand and a swing arm stand. The cherry on top was that it was a one-owner. To me, it appeared like a package deal that was too sweet to pass up.
After a successful 10 minute test ride most everything seemed in order. The engine had great power; it shifted smoothly and everything felt tight. There was a strange noise though – like a high frequency vibration coming from the front of the bike which only happened when you hit a bump in the road. I had done some prior research and I knew that a loose ignition switch mount could cause this sort of sound. I marked that up to an easy fix as well – nothing to worry about.
After the test ride I talked to the seller about my findings in an attempt to create some bargaining leverage. A little price haggling action later and I found the green machine in my possession, unknowingly having just set my agenda for the next few weeks.
Assessing the Damage
I got the bike home and I immediately made a list of all of the jobs that I knew needed doing just from the surface. It went something like this:
Advertisement
- Figure out why the rear brake doesn’t operate the brake light
- Change all the fluids
- Tidy up the wiring
- Get rid of all those hideous zip ties
- Look into that vibration noise coming from the front
- Install an original crankcase vent hose
- Give it a thorough cleaning
Oh how sweet it is to be naïve.
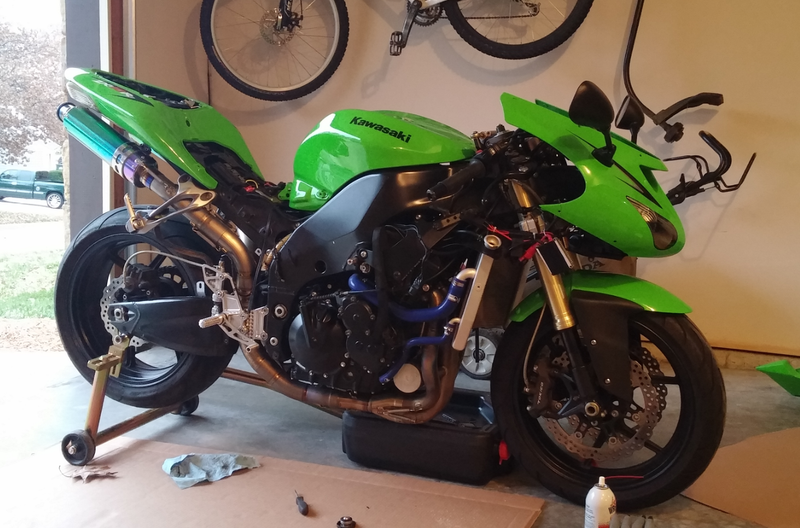
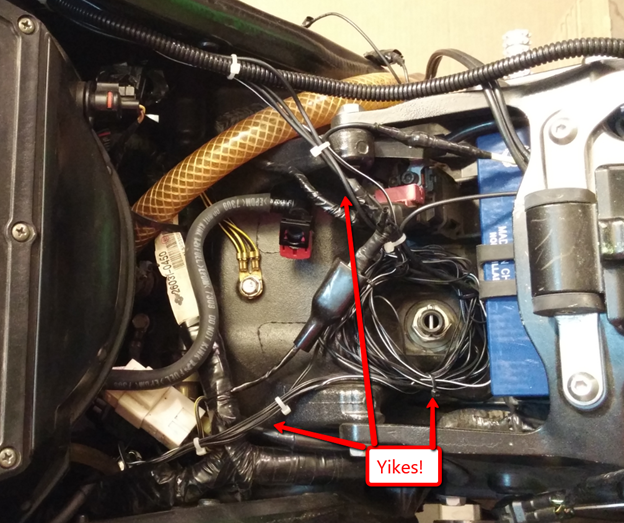
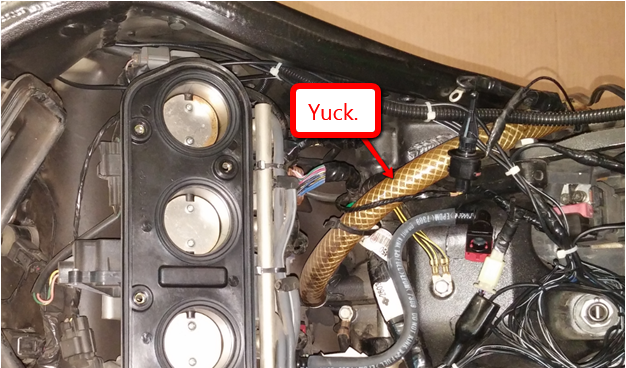
It wasn’t until after I had spent a long time staring at a picture of a stock version of the bike that I found myself subjected to a helping of Twilight Zone-grade buyer’s remorse. The enormity of things wrong didn’t present themselves until I began disassembling the bike. The complete and utter lack of understanding the previous owner had regarding the installation of a majority of the aftermarket items quickly became mind boggling. Let this picture just be a glimpse of the nightmare that lay ahead:
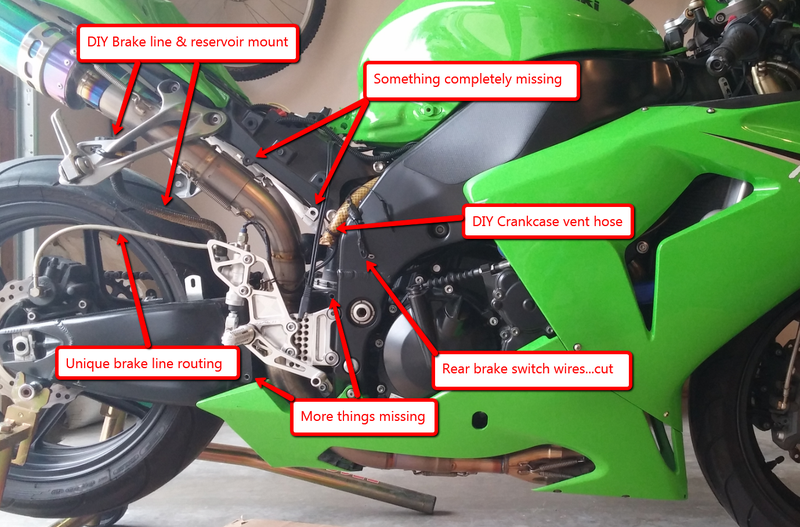
Let’s just say the previous owner had successfully ingrained themselves in this bike. It was now my duty to remove their legacy.
Wiring & Electrical
1. Rear brake light switch repair
The brake light on this bike didn’t illuminate when you used the rear brake. I put this job at the very top of the repairs due to it being a safety hazard. If your brake light isn’t working, then you’ve just made yourself a dead man on a motorcycle. Getting rear-ended even with a functioning brake light is always danger, but it’s almost a guaranteed situation if it doesn’t work at all.
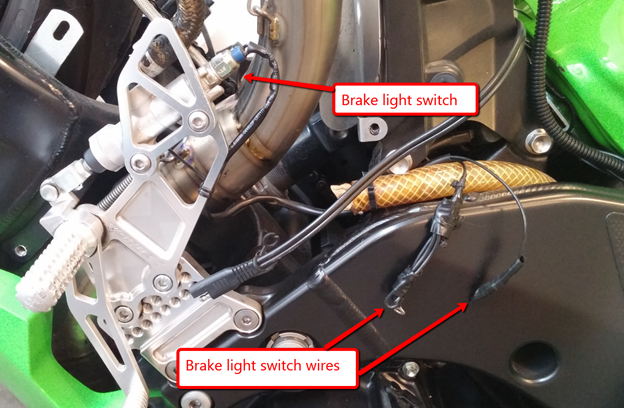
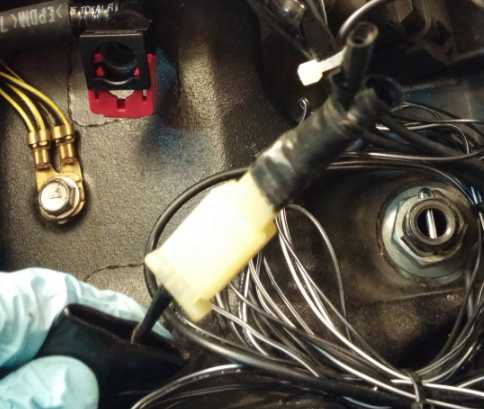
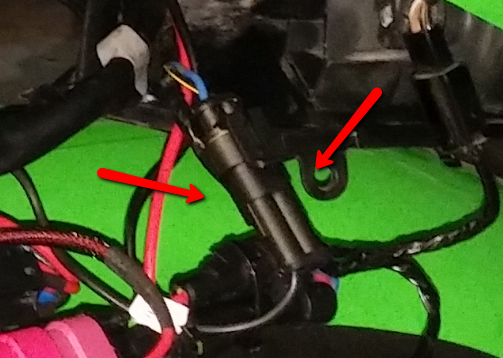
After a little digging, I found that the wires running to the brake switch were cut. Great. Now it was time to determine why they were cut. In order to locate the other end of the wires I had to remove the gas tank to get a better view. Wouldn’t you know it, lying out in the open, were the receiving wires. The picture isn’t great but you can tell that it is a male/female connector. The point of a connector is to make disconnecting and reconnecting an electrical circuit a fast and effortless task. Unfortunately the previous owner found that cutting the wires was an even faster solution.
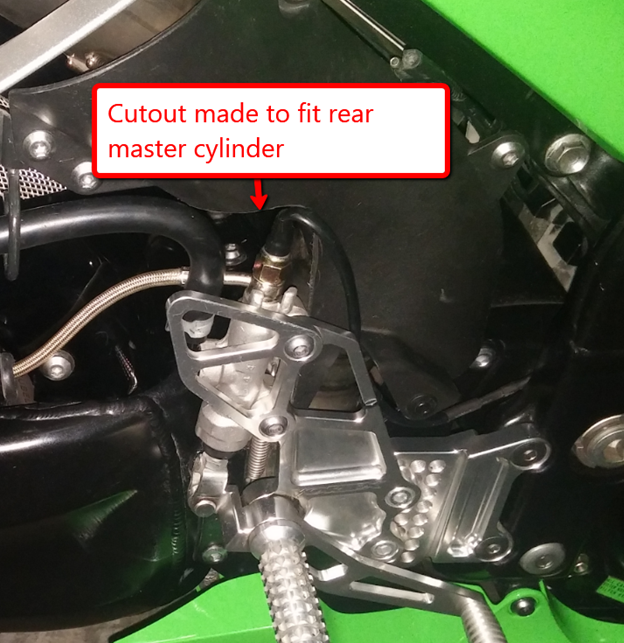
At this point I decided to test the brake light switch, because shoot, even an idiot has a reason for cutting wires. Hooking up one of the switch’s wires to 12 volts and other switch wire to a grounded voltmeter, I operated the rear brake lever. Low and behold, the switch was bad. This bike was fitted with aftermarket adjustable foot pegs which couldn’t utilize the original brake light switch. An aftermarket switch was fitted that mounts to the brake line fitting at the rear brake master cylinder. It is operated by an increase in brake fluid pressure when the brakes are applied. Due to this design, for whatever reason, they tend to go bad after a couple of years. $20 later and I had a new switch installed. I then correctly spliced, soldered, and heat shrunk the new switch into the bike’s wiring harness utilizing the original electrical connector. You know, how it should have been done in the first place.
The brake light now worked great, front to back. One job done and a crap load left to do.
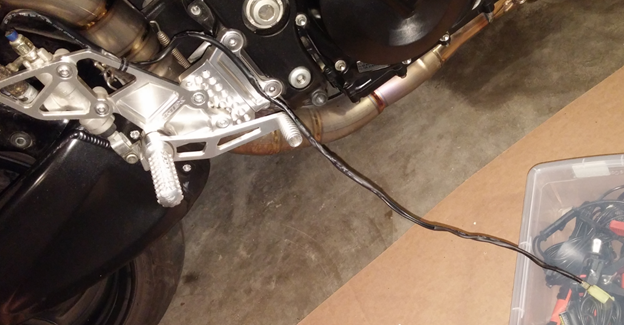
2. LED light kit removal
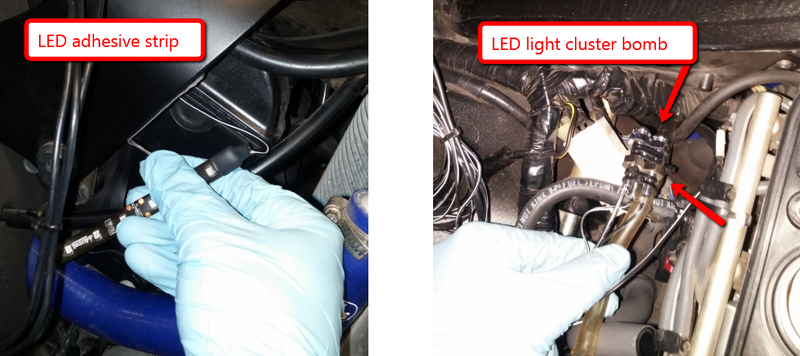
I’ll never understand the whole “underglow” fad but I realize everyone’s tastes are different. If you are going to go through the trouble of installing lights like this, at least do a decent job of it. What I’m about to show is what a poor attempt at an installation looks like. If I had known the bike had something like this going on when I first went to look at it, I probably would have walked away. It shows the previous owner’s carelessness which is often a bad sign. It was too late now so I just had to do my best at removing the remains of this nasty plague.
The most frightening thing yet: Speaker wire for days.
As I followed the wires I kept discovering more lights in the most random locations. In the end I was able to remove all of the electrical tapeworms. I was thankful that the previous owner had made no permanent modifications to frame or bodywork when they installed them.
3. Tag light repair
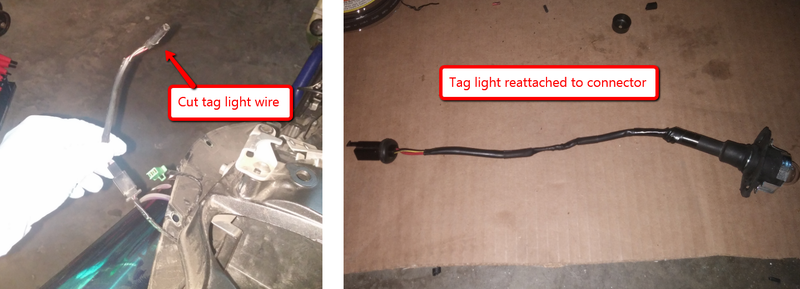
Where I live it is illegal to be running around without some sort of tag light, and of course, the bike no longer had one installed. I had the original rear fender and tag light and I figured I could simply reinstall these items to resolve my problem. This should have been a simple plug-and-play operation, but I couldn’t seem to find an electrical connection for the tag light. Removing the tail fairing was the only way to get to the bottom of this issue. With the fairing removed, I found what I should have been expecting: cut tag light wires. Heaven forbid that the previous owner use the existing connector…
I put my soldering skills to use again by reattaching the tag light to the connector in the way that Kawasaki originally intended. It’s a warm fuzzy feeling making simple things like this right again.
I know that most motorcycle owners do not like the large piece of factory-installed plastic that hangs off of the back of bikes. These rear fenders can somewhat interfere with the profile of otherwise streamlined bodywork.
I agree that they aren’t the most beautiful features in the world, but believe it or not, they actually do serve a purpose when a bike is doing street duties.
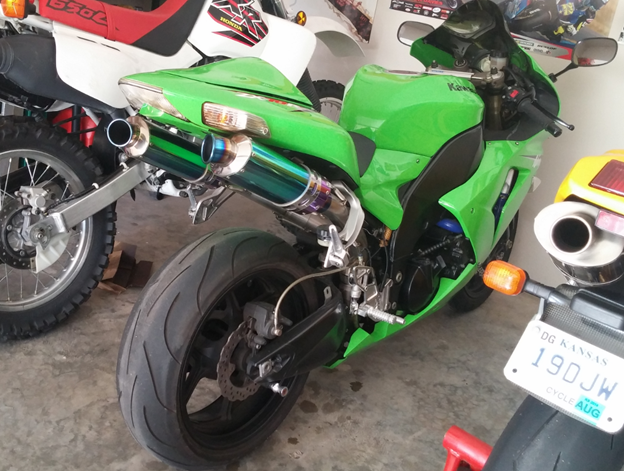
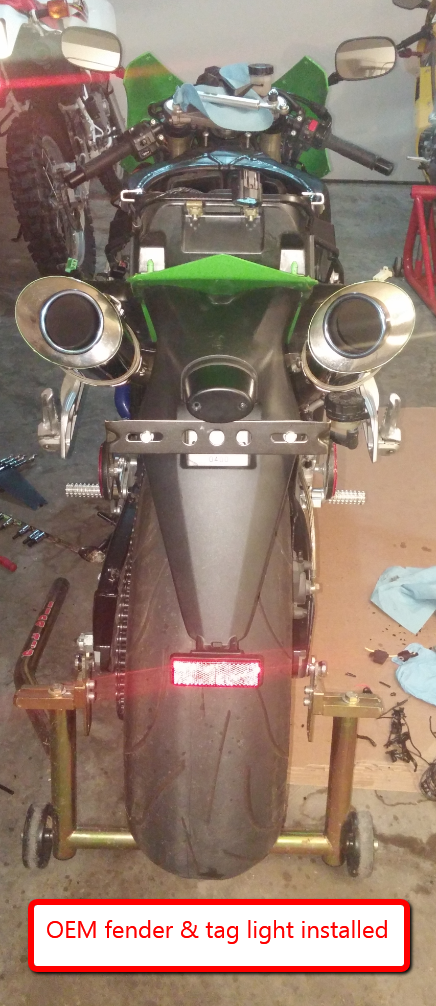
I always make sure to put the rear fender back on whenever buying a used bike. I like having OEM pieces in place that coincide with high-quality aftermarket enhancements, such as a nice exhaust system.
The presence of OEM pieces like the rear fender, reflectors, chain guard, and turn signals makes me feel like I’m being “responsible” with such an outlandish machine such as a ZX-10R. Having these items installed and regulating the bike to street use is like strapping a leash on a tiger and calling it a pet. Both could kill you with one wrong move, but at least you’re doing your best at making it appear that you have things under control.
After reinstalling the OEM rear fender I now had a legitimate tag mount and and tag light. The extra splash protection that comes with it is never a bad thing!
4. HID headlight repair
At the time of the purchase I thought the HID headlights were a great upgrade. As it turned out, these lights became a huge pain in the neck. It all started with the simple objective of removing all of the hideous zip ties securing wiring inside of the front cowl. As I began rummaging around, I discovered some humongous electrical issues.
Seriously, what in the hell is all of this?
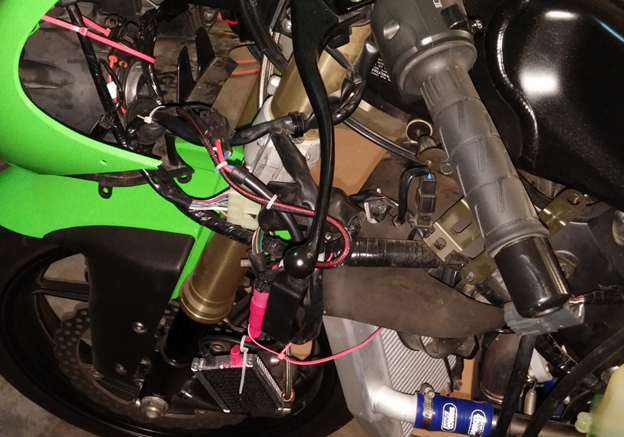
Oh you know, just some random broken connector exposed and zip ties there just to be there. The Craigslist presence was real.
Just when I thought it couldn’t get any worse, I found this wonderful homejob of a connection hiding within.
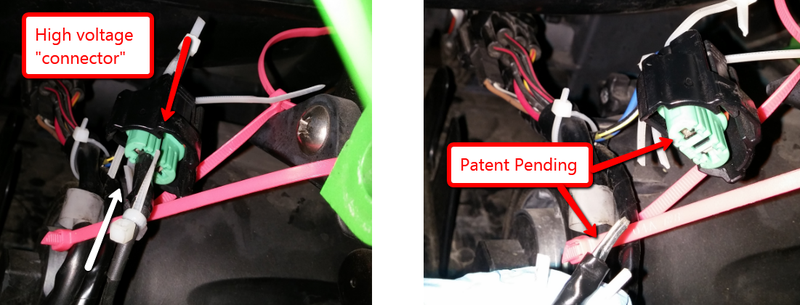
What we have here is the main power connection for the HID ballasts. I can’t even begin describe its masterful design, but I will still try. First, we have the male connector made of the highest quality model railroad track joiner. That part feeds into the receiving female connector. This high voltage combo is secured together with the fastener of champions, the zip tie. No water proofing needed here!
Yeah, no. I removed that crap and put in a legitimate high voltage waterproof connector.
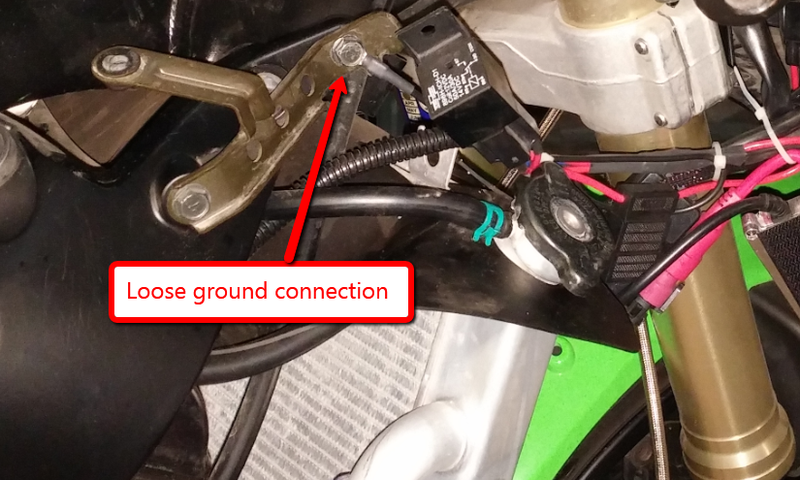
What I found next was worse than the above connector blunder. Remember that high-frequency vibration noise I had heard on the test ride and how it only seemed to make noise when hitting a bump? All of that was due to a loose ground for the HID headlamps. That noise was literally sound of electricity arcing every time the ground connection was jostled. It also means that the headlights were flickering every time I hit a bump which there was no way of knowing when out on the test ride.
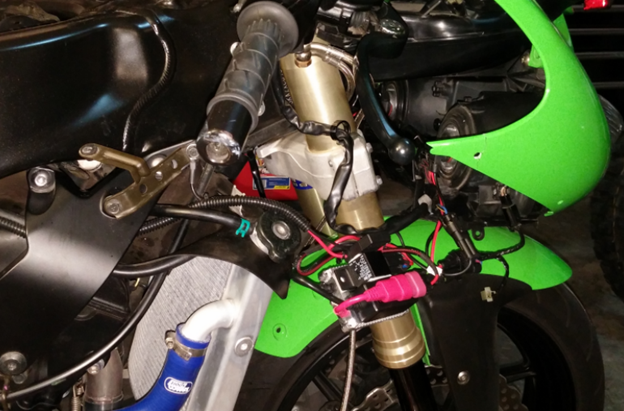
After reorganizing the wiring harness routing and reorienting the HID ballasts, the headlights were finally sorted. The wiring still looks a bit jumbled and free hanging, but that is mainly because the ballasts actually mount to the insides of the fairings when the fairings are installed. At the very least, electrical connections were now legitimate, similar items were now grouped appropriately, and the hideous zip ties were now a thing of the past.
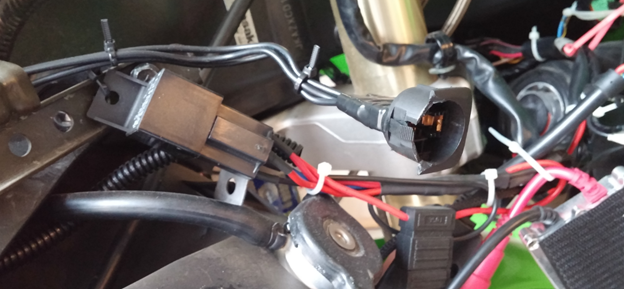
5. Installing a horn
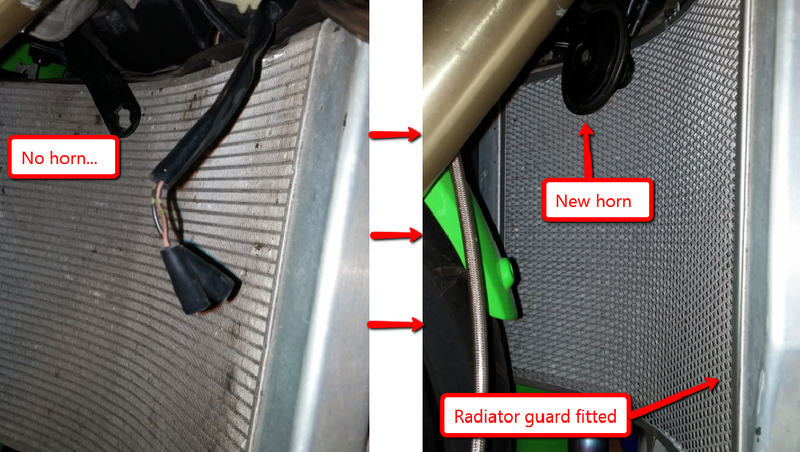
Who removes their horn? I’m all for installing a louder horn, but removing it completely? A horn is one method of accident prevention, and on a bike, you need all the methods you can get. As you can probably guess, the previous owner did just that – there was no horn fitted, just dangling connectors where a horn used to be. I hopped on eBay and picked up an original horn for peanuts. While I was down there I took the opportunity to also install a radiator guard.
Mechanical & Body
Now that I had all of the electrical issues out of the way it was time to move into the mechanical and cosmetic issues.
1. Refit original crankcase ventilation system
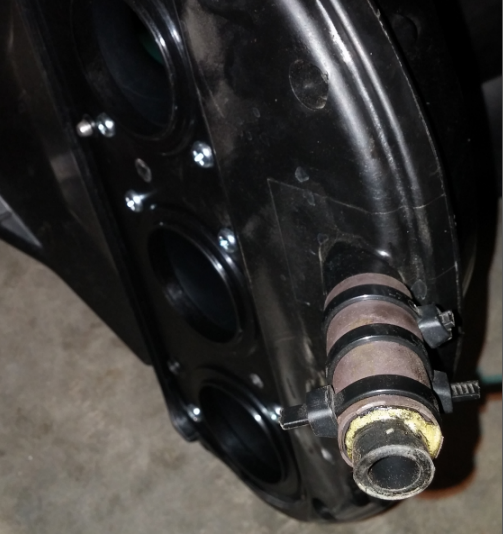
The previous owner decided to fit his own style of crankcase ventilation system which utilized the finest of home furnace water drain hose.
They also decided to plug the crankcase ventilation opening in the airbox with a rubber cap sealed with some Gorilla Glue.
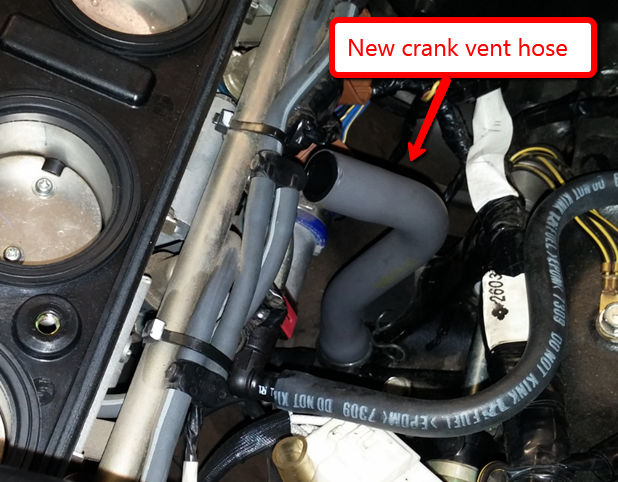
My lack of surprise was justified at this point. All you can do is laugh and do your best to make it right again. With both of those customizations removed, I then installed a new OEM crankcase vent hose and reinstalled the airbox.
2. Reinstall heat shielding
The previous owner decided to ditch all of the heat shielding on the right side of the bike. This is probably because it didn’t fit correctly once the aftermarket exhaust was installed. I felt like Kawasaki had put heat shields there for a reason, so I decided to reinstall them.
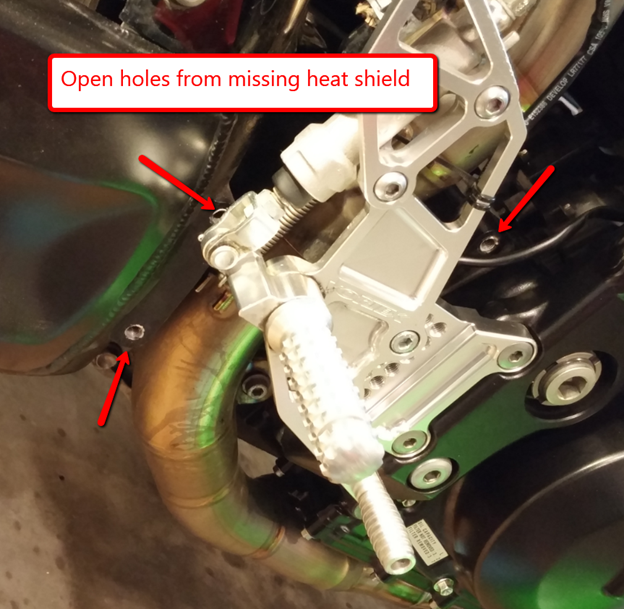
After some slight modification to the original heat shield, I had the lower shield back in place doing its job.

The upper heat shield was also missing. This too required some modification to fit due to the aftermarket foot pegs. Following some controlled Dremeling action the shield fit as good as new.
3. Fix the rear brake issues
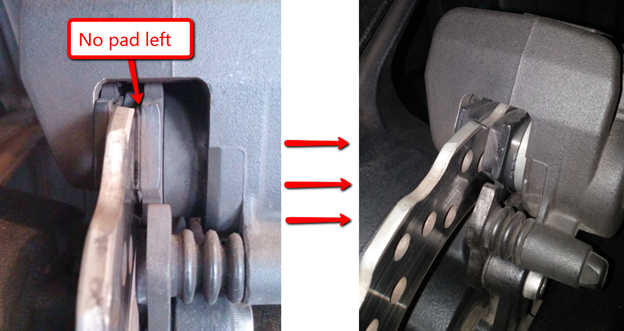
There were a few bad situations going on with the rear brakes. The first issue that needed attention was the rear brake pads, which were practically non-existent. This was an easy fix that necessitated removal of the caliper, a little cleaning, a re-greasing of the caliper sliding pins, and the installation the new pads.
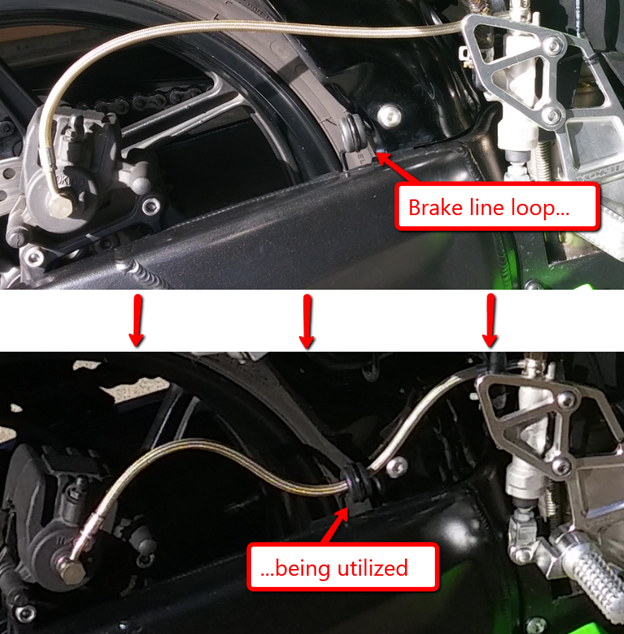
I then set off to fix the goofy brake line routing that was going on. This will sound crazy, but bear with me. Maybe you should use the facets that have been engineered into the bike to help guide you when installing parts? That is something the previous owner didn’t pick up on. For example:
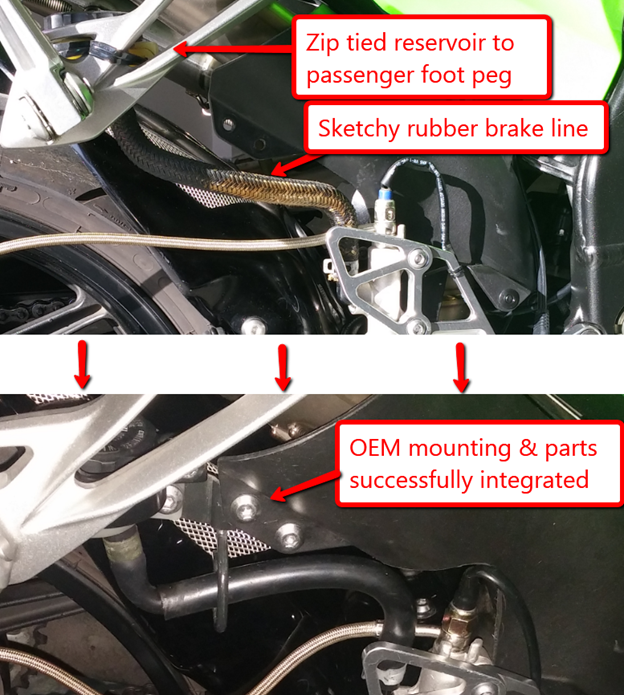
Finally, it was time to fix that hideous rear brake fluid reservoir mount that the previous owner had jerry-rigged. Again, it is best to use the original designs that the Kawasaki engineers developed whenever possible. With a minimal amount of fiddling, I was able to make the original reservoir mounting location work with the aftermarket rear sets and exhaust.
4. Replace the water pump
Remember how the coolant reservoir was empty when I purchased the bike? I had assumed it was down to the previous owner having no clue about how to bleed the system. It turns out that was not the case. I began to notice a puddle of coolant collecting underneath the bike. After some detective work it appeared that the leak was originating from the water pump. Awesome.
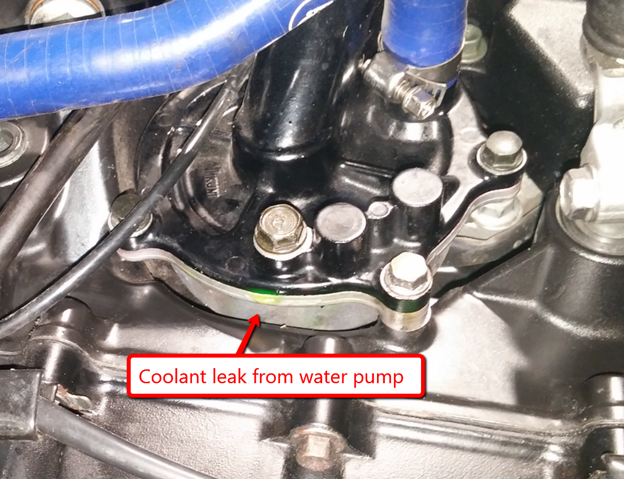
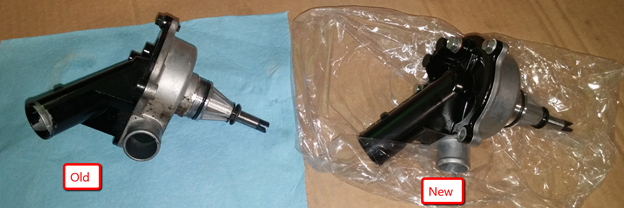
The only way to fix this is to order a whole new pump assembly as the pump is not a serviceable part. It turns out this is a common issue on these ZX-10Rs. This is a great example of why it pays to do your research before making a purchase. The new pump arrived after I parted with $170.
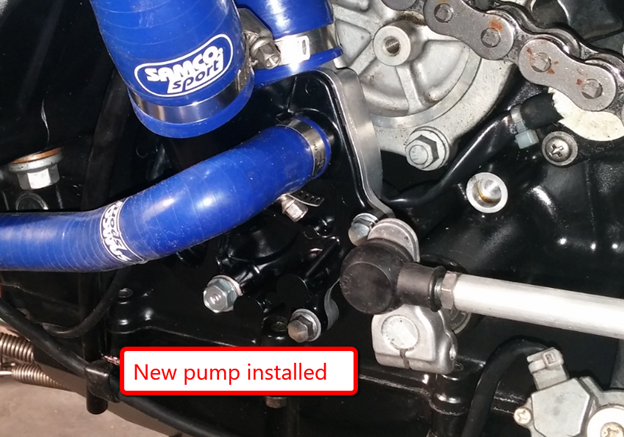
Here is the new pump installed. Since I had to drain the coolant to complete the job, I used this as an opportunity to perform a flush and refill of the bike’s coolant system.
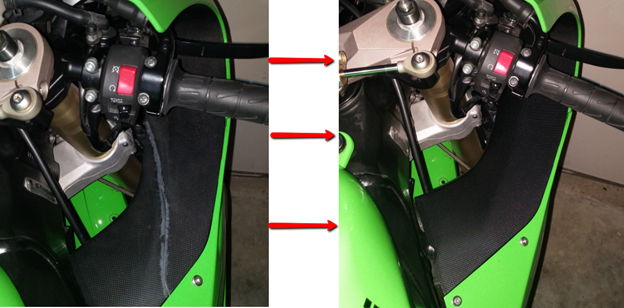
5. Replace broken trim piece
This was a simple job and it was one of the few defects I knew about when I bought the bike. The inner fairing on the right side was cracked and looked pretty terrible. The ZX-10R has a very tall kickstand which means the bike is nearly vertical when it is propped up on it. Even on a level surface it wouldn’t take much to knock it over on the right side. Inevitably this had happened to this bike at some point and the inner fairing took most of the impact. $45 later and it was replaced with a new one.
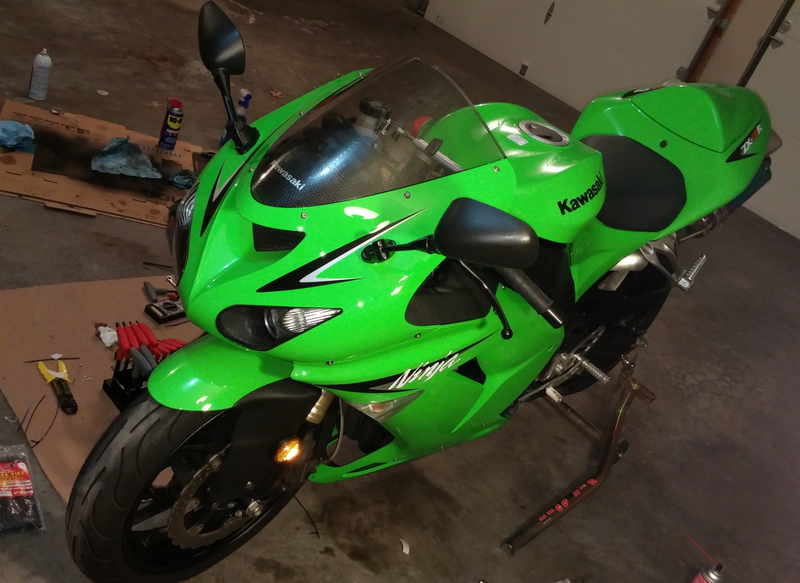
Exorcism Complete
This whole process of putting the bike right took around a month and about $450 in parts and supplies. Had I known of all of the “personality” that the previous owner had put into the bike, I probably wouldn’t have bought it. There is no way I scored that good of a deal on it. The silver lining in all of this mess is that I now know the bike inside and out. It is now put together correctly and devoid of all traces of the previous owner.
Grabbing a great deal off of Craigslist is a fun and often rewarding experience. However, if you begin to see red flags when looking over a bike or car, it can point to deeper issues within. Sometimes walking away from such a potential purchase is the best thing you can do. If you are still convinced that it is the right machine for you, just make sure you are braced financially and mentally for the unknown issues that are most likely present.
You can always remove Craig from his List(ing) – it just depends how much effort you’re willing to put in to make that happen.